Saturday, January 30, 2016

Behind the Scenes: The process of designing, choosing stitch patterns

Behind the Scenes of Designing Knitting Patterns with KarenDawn Designs: Choosing Stitch Patterns

In this blog post, I wanted to share some of the behind-the-scenes things that happen during the process of designing a knitting pattern. Every designer is different, so this is specific to my process, but some parts are fairly common across the board.

Behind the Scenes of Designing Knitting Patterns with KarenDawn Designs: Choosing Stitch Patterns
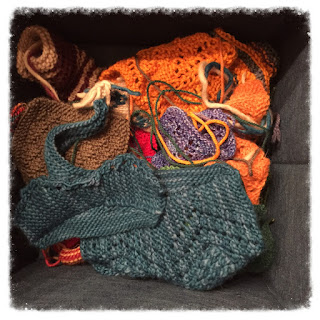
I've made more swatches since I started designing than I ever have in the ten years I've been knitting. I swatch to try out stitch patterns, to figure out gauge, and to see if what I have in my head actually works in the knitting.
Behind the Scenes of Designing Knitting Patterns with KarenDawn Designs: Choosing Stitch Patterns
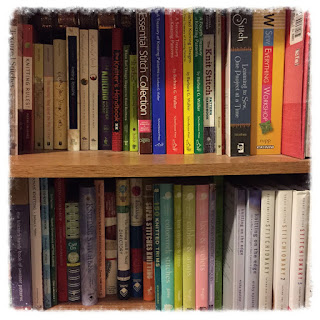
My knitting library has changed quite a bit in the past year or so. Although I still have quite a few books with patterns, my library now mostly consists of books about designing and stitch dictionaries.

I don't have just one way that I go about starting a design, but in general, I approach a design from one of two angles: either I have a stitch pattern that I fall in love with and then figure out what I want to use it for or I know that I want to knit an X (cowl, hat, shawl) and have a basic idea in mind for the stitch pattern so I either do some sketching or look through stitch dictionaries to figure out the details of the stitch pattern.

For example, with The Wife of Bath's Cowl, I knew I wanted to knit a cowl and I had an idea pop into my head: what if I added eyelets to cables? I did some sketching and charting, came up with an idea, and swatched it. I usually like to knit my cowls in the round, but I realized that for this particular stitch pattern, knitting in the round meant short repeats of the cable/eyelet pattern, and I thought it might be better to have the cables repeat the length of the cowl, which meant knitting it flat and then joining the ends. So then I had two choices: I could do a provisional cast on and graft the two ends together to create the cowl or I could use buttons, which is what I ultimately chose.

With the Dorigen Cowl, I found a stitch pattern I really liked and thought it would make a nice cowl. But when I swatched, I realized that the stitch pattern as given in the stitch dictionary wasn't quite "right" so I made a few alterations to it. And then I started the cowl. Something wasn't working and the stitch pattern wasn't showing up like in my swatch. So I frogged, made some adjustments, and started again. Still not right. Fortunately, the third time was the charm for this one and I was able to get through the sample and write up the pattern.

These days, I spend a lot of time flipping through stitch dictionaries and marking stitches that jump out at me. A few weeks later, I might go back through that dictionary and wonder what I was thinking when I marked X pattern as it no longer appeals to me! Other times I think, "oh yes, I remember really liking that one and I still do. I really must do something with it!" and it becomes the next thing I work on.

~~~~~~~~~~~~~~~~~~~

The content in this post was first featured in my newsletter (June 20, 2015). If you'd like to keep up to date on my designs and yarn and receive content like this right in your email inbox, make sure to subscribe to my newsletter.

Saturday, January 23, 2016

Working with Tight Twist Yarn

Knitting Tips and Tricks from KarenDawn Designs: Working with Tight Twist Yarn

When you have yarn with a tight twist, how you work with the yarn can make a big impact on how the yarn goes into your project. What I mean by that is sometimes when you pull yarn from the ball/cake, you inadvertently add extra twist to the yarn. Although this is problematic with any yarn, when you have yarn that is already tightly twisted, adding in more twist can make the yarn start to kink up on itself, which can be a frustrating experience. Not only that, but if the extra twist goes into the knitted object, the unbalanced yarn can create bias in the fabric. Probably not something you want!

Do you wind the yarn into a cake? If so, do you pull from the center (or use a center-pull ball) or do you pull the yarn from the outside? For years, I pulled yarn from the outside because I liked keeping the cake neat, and pulling from the center meant that the more yarn that was used, the more the cake would collapse on itself, sometimes creating tangles. But the way I was pulling yarn from the outside was adding extra twist to the yarn, which also caused problems. (Pulling from the center does add a little twist.)

I had the cake sitting either beside me or on the floor and I was essentially pulling the yarn up off the cake while the cake remained in the same place. This is what creates extra twist. I finally got tired of it and decided to try pulling from the center. And although I still have cakes collapse on themselves, ultimately this is a better experience. But the best way to not add extra twist to the yarn is actually to pull from the outside, but to do so smoothly. How can you do that?

You need the yarn cake to travel with the yarn rather than remaining stationary. If you spin the yarn cake while the yarn is coming off of it, the yarn is being smoothly drawn from the cake and not getting extra twist. You can do this by using a yarn spinner or a yarn bowl.

Although I don't have one yet, a knit spinner from Craftiness is definitely on my wishlist. (And it looks like it'll remain on my wishlist for a while as the Craftiness shop owner is moving and has the shop on vacation mode right now. I've linked to a sold listing so you can see what I'm talking about.) Other shops have yarn spinners as well, under various names: there's this one, this one, this one, this one, and this double one, for example. The basic idea is that it allows the yarn cake to turn as you are pulling from it.

Yarn bowls come in all sorts of shapes and sizes and materials. The idea here is that you want a hole or groove that holds the working yarn and the bowl to allow the yarn to turn while you're pulling. Here are a few that caught my eye, but just do a search for "yarn bowl" and you'll find lots of options: pretty ceramic bowl, one with a cat, a Doctor Who one, and a lovely wooden one.

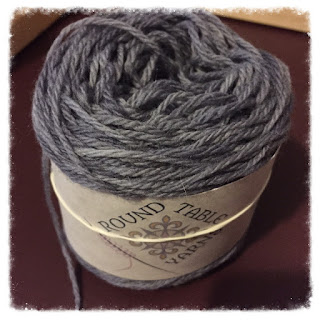
I also recently got a tip that helps a bit when you are pulling yarn from the center of the cake to keep it from collapsing on itself so much. This tip came from Ted, who is part of my local knitting group: I had given him a cake of yarn to knit a sample of one of my patterns (thanks, Ted!) and put the label around the cake; the label wasn't long enough to tape it on, so I wrapped a rubber band around it. When Ted was working with the yarn, he left the label and rubber band on and pulled from the center. As the yarn was used, the rubber band tightened, which tightened the cake and didn't allow it to collapse. I tried it myself and Ted was right: it works really well! Thank you for the excellent tip, Ted!


Knitting Tips and Tricks from KarenDawn Designs: Working with Tight Twist Yarn

So if you're having problems with extra twist getting into your yarn while you're working with it, take a moment to consider how you're getting the yarn from the cake/ball to the needles.

~~~~~~~~~~~~~~~~~~~

The content in this post was first featured in my newsletter (June 5, 2015). If you'd like to keep up to date on my designs and yarn and receive content like this right in your email inbox, make sure to subscribe to my newsletter.
 

Saturday, January 16, 2016

Spotlight on Gawain

Pattern Suggestions from Round Table Yarns for Gawain a fingering weight superwash merino wool yarn with a tight twist

Gawain is a 3-ply fingering weight yarn with a tight twist. Because of the plies and twist, this is a great yarn for showing off textured stitches and cables. I picked this yarn base specifically to match with the Brangien Hat.

Pattern Suggestions from Round Table Yarns for Gawain a fingering weight superwash merino wool yarn with a tight twist
Although this yarn base has no nylon content (it is 100% superwash merino), it would still be appropriate for knitting socks because the tight twist will help it wear better (although still not as well as yarn with nylon in it). I'm imagining some yummy cabled socks in this yarn! (And at some point, that will happen.)

Some other pattern suggestions for Gawain:
Nennir (cowl) by Lucy Hague
Smaug Socks by Claire Ellen
The Pointy End (socks) by KnittyMelissa
Kyna (shawl) by Lucy Hague (and the other projects in this collection)
Denature (socks) by Margaret Mills
Tara (socks) by Janneke Maat
Strigidae Mitts by Glenna C.
The Wife of Bath's Cowl by Karen Robinson

Buy Gawain here!

~~~~~~~~~~~~~~~~~~~

The content in this post was first featured in my newsletter (June 5, 2015). If you'd like to keep up to date on my designs and yarn and receive content like this right in your email inbox, make sure to subscribe to my newsletter.
Saturday, January 9, 2016

Changing Colors in Reverse Stockinette or Ribbing

Knitting Tips and Tricks from KarenDawn Designs: Changing Colors in Reverse Stockinette or Ribbinga

In the middle of my Chauntecleer Cowl, the colors are switched so that the contrast color with the narrow stripes becomes the main color. When I was designing this cowl, I had a decision to make at this point. The contrasting stripes are done in reverse stockinette. If I were to continue the reverse stockinette at the color change, I would have gotten an effect that I did not like, similar to the following: 
Knitting Tips and Tricks from KarenDawn Designs: Changing Colors in Reverse Stockinette or Ribbinga
This is the reverse side of another project, but the lines of the pink overlapping the grey would have been very similar to what would have happened if the Chauntecleer Cowl transitioned colors during the reverse stockinette portion. So instead, I inserted a knit row at the color change and then did another purl row--in essence, changing the reverse stockinette to garter for just one round. Although there is a slight difference in the reverse stockinette vs. garter, the color transition works much better than it would have otherwise.

Knitting Tips and Tricks from KarenDawn Designs: Changing Colors in Reverse Stockinette or Ribbinga
So what if you're working on a project and there's a color change in the middle of reverse stockinette or ribbing? Take a look at this sweater I made several years ago:

Knitting Tips and Tricks from KarenDawn Designs: Changing Colors in Reverse Stockinette or Ribbinga
This is the right side of the sweater, the public side--what everyone sees. See how the color change is not neat? Even though I love this sweater, it bothers me every time I wear it and see this clunky color change. What could I have done differently?

Instead of continuing with the ribbing on the first row of the color change, I could have done a solid knit row. In a field of ribbing, a single row of stockinette at a color change is a lot less obvious than what appears in the picture above. It's a much more seamless transition.

Now, you probably don't want to do that if you have very thin stripes (such as just 2 rows of each color) in ribbing because then it would make every other row a solid knit row and that would show up. But if you have thicker stripes like in this sweater, the solid knit row at the color change trick is super helpful. Give it a try next time you have a project like this and see what you think.

~~~~~~~~~~~~~~~~~~~

The content in this post was first featured in my newsletter (May 20, 2015). If you'd like to keep up to date on my designs and yarn and receive content like this right in your email inbox, make sure to subscribe to my newsletter.
Saturday, January 2, 2016

Guenevere Pattern Suggestions

Pattern Suggestions from Round Table Yarns for Guenevere a fingering weight 2-ply superwash merino wool yarn

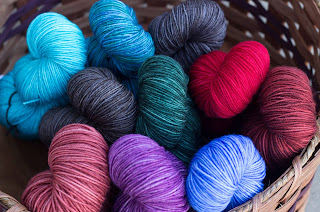
In a previous blog post, I talked about picking yarn for lace shawls and how using a 2-ply yarn really makes lace pop. Guenevere is the 2-ply fingering weight yarn available for Round Table Yarns, and there are several skeins (including several colors with two skeins available) currently available in the shop. Although I picked Guenevere specifically to go with my Astolat Shawl pattern, there are a number of other options out there from other designers that would work well for Guenevere. I've made a quick list based upon some of the projects that I might knit myself using Guenevere.

Haruni - I still haven't made one of these myself (I do plan to some day!), but this very popular shawl would look great with Guenevere (2 skeins)

Ashton Shawlette - I was struck by the delicate look of the shawl in the pictures for this pattern. It looks like you could just make it with one skein of Guenevere.

Henslowe - I've become a big fan of knitted on borders, so this shawl caught my eye with its gorgeous border. (This one also might squeak by with just one skein of Guenevere.)

Dark Valentine - This pattern can result in a scarf or wrap and would use one or two skeins of Guenevere, respectively.

Dayflower Cowl - I really like the stitch pattern used on this cowl and think Guenevere (1 skein) would highlight the delicate nature of it.

Wasabi Hat - You have to go look at this hat! The image of the top of this beret is quite striking. I think I'll add it to my queue.

NOTE: You should always do a gauge swatch--not just to check to see if your gauge matches but also to make sure that you like the resulting fabric that you get. If you find that although you have matched the gauge but you don't like how the fabric looks, that might not be the right pattern/yarn combination for you, so give another pattern a try.

I'm looking forward to seeing what patterns you match up with Guenevere. And I'm always happy to help if you have any questions about matching up a pattern to any of the selections from Round Table Yarns. Just drop me an email or a Ravelry message!

~~~~~~~~~~~~~~~~~~~

The content in this post was first featured in my newsletter (May 5, 2015). If you'd like to keep up to date on my designs and yarn and receive content like this right in your email inbox, make sure to subscribe to my newsletter.